12. Mix Tab

Basic View
Section titled “Basic View”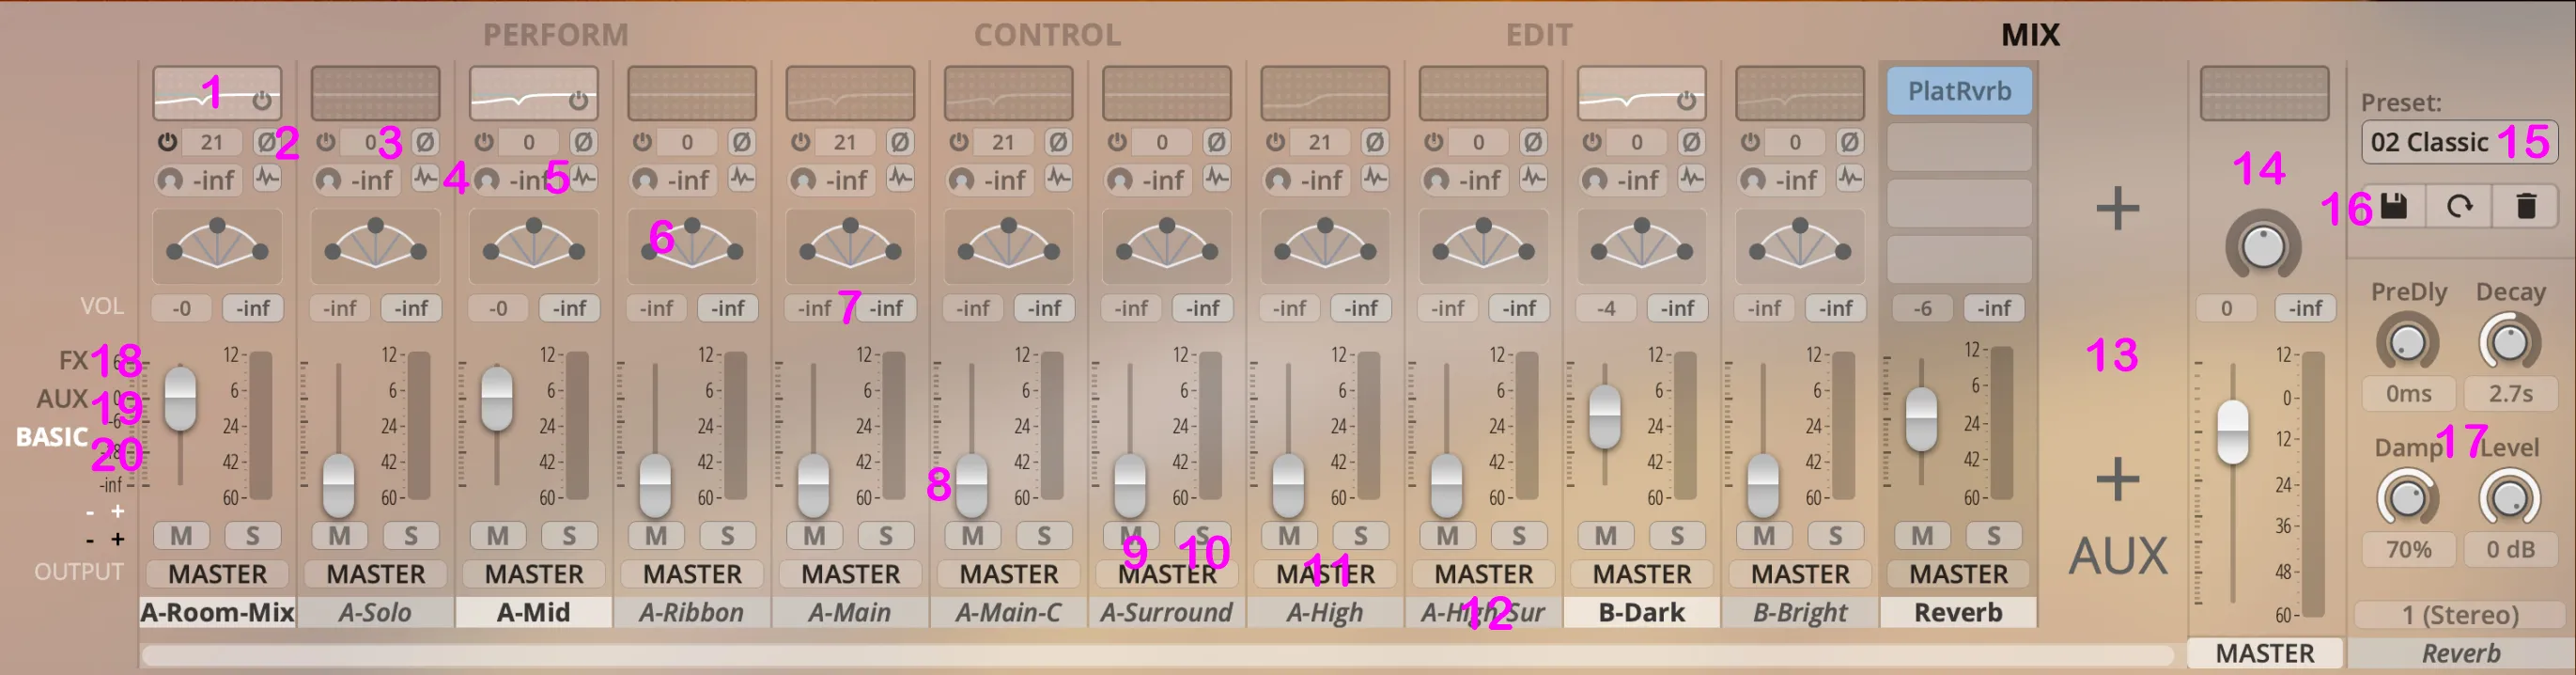
-
Q: 채널 이퀄라이저. 더블 클릭하면 전체 설정 창이 열림. 전원 버튼은 채널 뷰 안에 들어 있음.
-
Delay: 채널 딜레이. 각 채널에 지연 시간을 더해 공간감을 더 크게 만들 수 있음. 값은 밀리초 단위임. 클릭한 채 드래그하거나 더블 클릭해 값을 수정 할 수 있음. Cmd/Ctrl+클릭으로 초기화함.
-
Phase Invert: 입력 신호의 위상을 뒤집음. 위상을 뒤집으면 아이콘이 오렌지색으로 바뀜.
-
Reverb: 리버브 센드. 각 채널에 보낼 리버브 양을 조정함. 주로 close/mid 마이크에서 사용함. 리버브 설정은 오른쪽 열 #17에서 조정함. 클릭한 채 드래그하거나 더블 클릭해 값을 바꿈. Cmd/Ctrl+클릭으로 초기화함.
-
Convolution Impulse Plug-in: Studio 제품용 커스텀 임펄스 리스폰스 파일이 들어 있는 Convolution Impulse Reverb 모듈을 엶. Dry/Wet 슬라이더와 컨볼루션 임펄스 브라우저가 포함되어 있음. Studio 제품 라이선스에서만 사용할 수 있음. 아래 설명도 참고.
-
Pan: 채널 패닝. Balance와 PowerPan 중에서 고름. Pan Law는 Settings => Engine에서 조정할 수 있음.
-
Volume Slider Values: 클릭한 채 드래그하거나 더블 클릭해 값을 바꿈. Cmd/Ctrl+클릭으로 초기화함.
-
Volume Slider: 핸들을 잡고 움직여 볼륨을 조정함. Shift를 누른 채 움직이면 더 세밀하게 조정할 수 있음. 클릭한 채 드래그하거나 더블 클릭해 값을 바꿈. Cmd/Ctrl+클릭으로 초기화함.
-
Mute: 선택한 채널을 음소거함. 음소거 상태에서는 노란색으로 바뀜.
-
Solo: 선택한 채널만 단독으로 재생함. 솔로 상태에서는 빨간색으로 바뀜.
-
Output: 출력 배정. 사용 가능한 출력 중에서 고름.
-
Channel On/Off: 클릭해서 채널을 켜거나 끔. Settings => Engine에서 채널을 끌 때 샘플까지 언로드할지 정할 수 있음.
-
Add Mixer/Aux channel: + 버튼을 눌러 새 채널을 추가함.
-
Master Channel: 첫 번째 스테레오 출력용 마스터 채널 스트립. FX 체인, 팬, 볼륨을 포함함. 마스터 믹스에 EQ를 간단히 추가할 수 있음.
-
Mix Preset: 제공되는 여러 Mixer Preset 중 하나를 고르거나, 직접 만든 프리셋을 불러오고 저장함.
-
Save/Reload/Delete: 현재 선택한 믹서 프리셋에 저장, 다시 불러오기, 삭제.
-
Reverb Settings: 내장 알고리즘 리버브 설정을 조정함. Shift+클릭 드래그로 미세 조정함. 클릭한 채 드래그하거나 더블 클릭해 값을 바꿈. Cmd/Ctrl+클릭으로 초기화함. 아래에는 출력 배정과 Reverb On/Off가 있음.
-
FX: 채널 FX 슬롯을 표시함.
-
SEND: 센드 슬롯을 표시함.
-
Basic: 기본 믹서 화면을 표시함.
AUX View
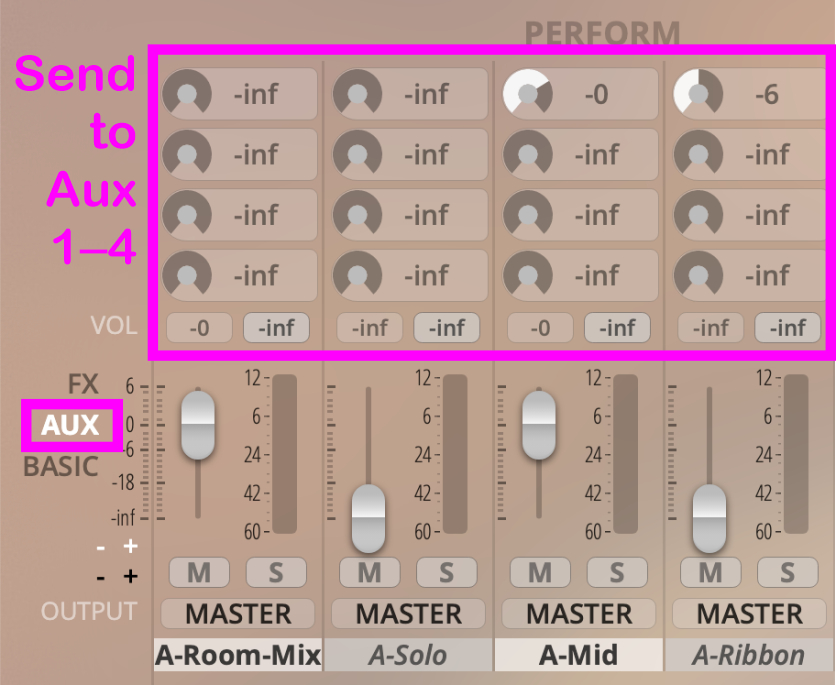
Section titled “AUX View”믹서의 AUX View에서는 볼륨 슬라이더 위에 최대 4개의 Auxiliary Send를 표시함. 믹스에 이펙트를 더할 때 쓰는 전통적인 방식이고, 시스템 자원도 적게 먹음.
FX View
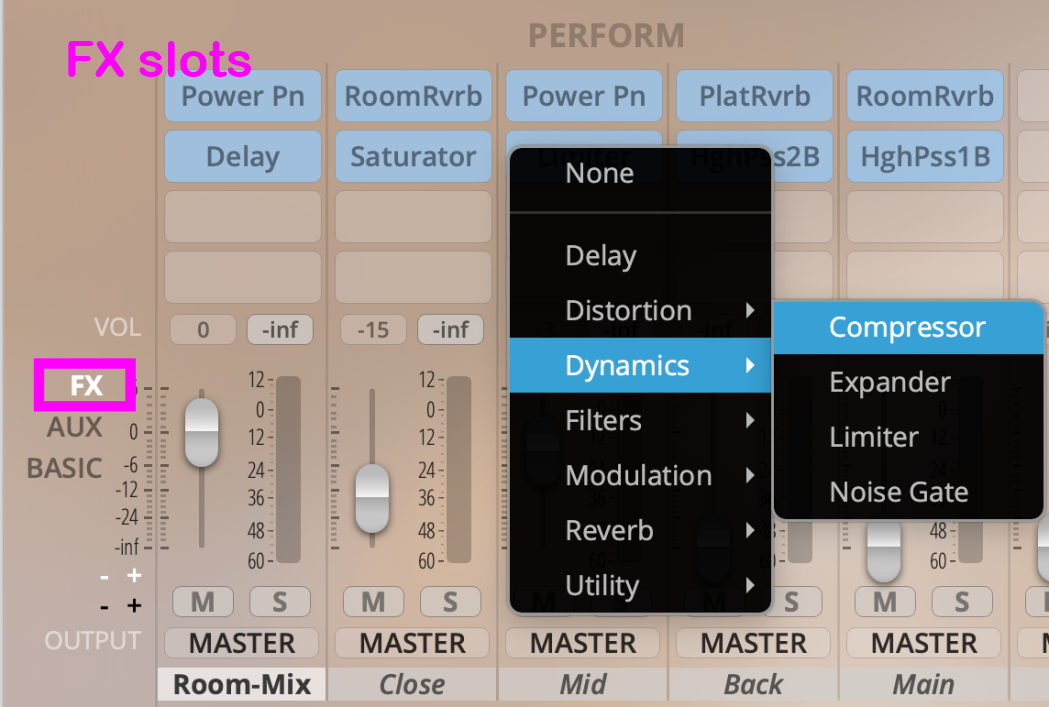
Section titled “FX View”FX View에서는 채널별로 이펙트를 따로 선택할 수 있음. 각 이펙트에 대한 자세한 설명은 FX Channels 장에서 확인하면 됨.
Bleed View
Section titled “Bleed View”- 이 기능은 Synchron Power Drums에서만 사용할 수 있음.
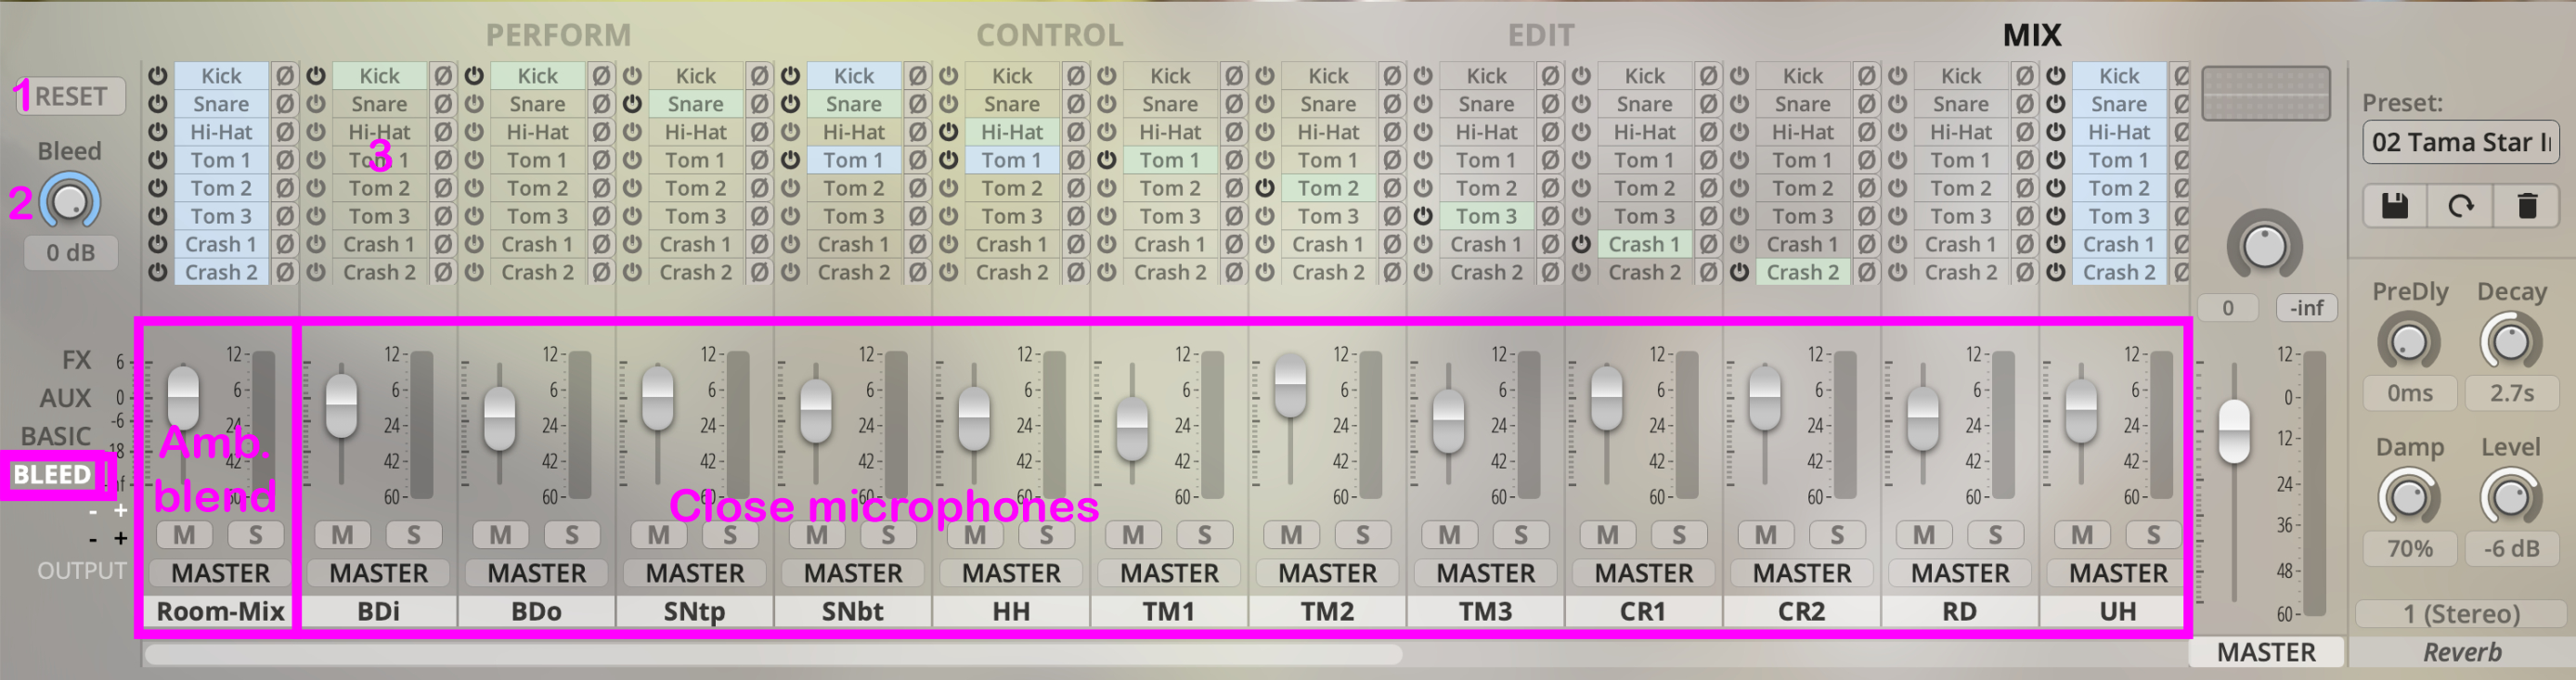
Bleed View에서는 특정 마이크 채널에 다른 악기 소리가 얼마나 섞여 들어갈지 조정함. BLEED 신호를 켜면 해당 인서트가 파란색으로 표시되고, 앰비언트 마이크로 들어가는 모든 입력도 파란색으로 표시됨. 각 채널의 원래 악기 소스는 초록색으로 표시됨. 스네어 드럼 마이크에 함께 잡힌 베이스 드럼의 Bleed 소리를 조금 더하면, 드럼 믹스가 훨씬 거칠고 생생하게 들리는 등 룸 사운드를 개성있게 만질 수 있음.
-
RESET: 모든 값을 선택한 믹서 프리셋의 원래 설정으로 되돌림.
-
Bleed: Master Bleed 노브는 전체 공간감을 조정함. 믹스 안의 공간 반응을 한 번에 다룰 수 있음.
-
Bleed View: 클릭하면 믹서에서 Bleed 설정을 볼 수 있음.
-
Bleed slots: 다른 악기에서 현재 악기 채널로 들어오는 Bleed 신호의 양을 조정함.
Mixer Presets
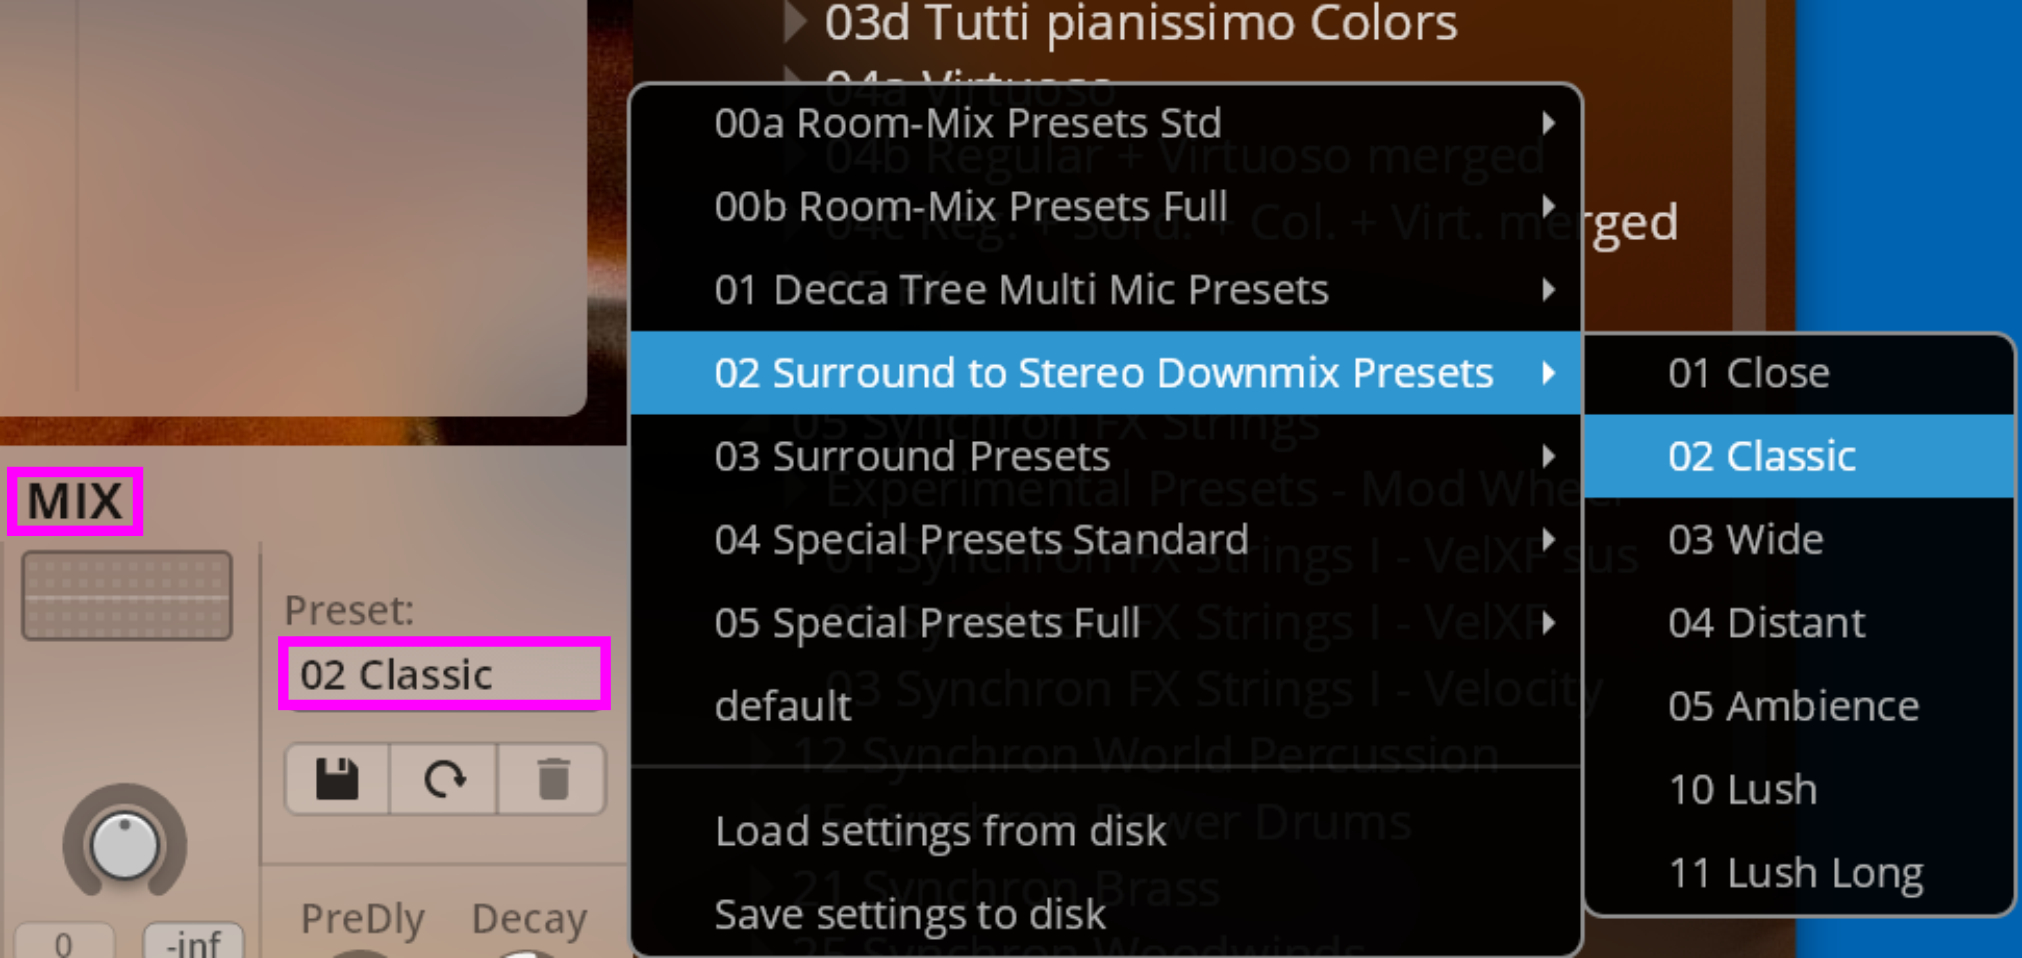
Section titled “Mixer Presets”Browser를 열면 여러 버전의 Mixer Preset을 확인할 수 있음.
믹서 프리셋은 Mixer Preset Browser에서 관리하는 편이 훨씬 쉽고 정리도 잘 됨.
Stereo Presets (visible for stereo plug-ins)
Section titled “Stereo Presets (visible for stereo plug-ins)”00 Room-Mix Presets
Go-To Presets는 모든 녹음에서 출발점으로 쓰기 좋은 기본 프리셋임. 가능한 적은 수의 마이크만 쓰고, Full Library에 들어 있는 모든 마이크를 섞은 Room-Mix 채널을 미리 준비해 둔 방식임.
필요에 따라 close, mid, back 마이크 신호를 더하거나 줄이면 직접음의 양을 쉽게 조정할 수 있음.
01 Decca Tree Multi-Mic Presets
Decca Tree를 중심으로 공간감을 잡는 프리셋임. Room-Mix보다 잔향이 덜 퍼지고, 소리가 더 또렷하고 가볍게 들림.
마이크별 비중을 세밀하게 조절할 수 있는 전통적인 스테레오 녹음 방식임.
02 Surround to Stereo Downmix Presets (Full Library)
사용 가능한 모든 마이크를 활용해 믹스의 선택지를 넓힌 프리셋임. 서로 다른 성격의 룸 마이크와 런타임 딜레이를 조합해 공간 깊이의 느낌을 더 다양하게 만들 수 있음.
믹스에서 위치감, 디테일, 윤곽, 복잡도를 다듬는 데 좋음.
Studio Presets (available only with a license for Studio products)
Studio 제품 라이선스가 있을 때만 사용 가능
추가로 NARROW 믹서 프리셋을 사용할 수 있음. 이 프리셋은 Vienna Synchron Stage 안에서 각 섹션을 더 가깝게 배치한 소리를 만듦.
Surround Presets (functional when Full Library is available)
Full Library가 있을 때 작동함
서라운드 세팅을 자유롭게 구성할 수 있는 프리셋임. close, mid, back 마이크와 Decca Tree 마이크는 메인 L-R 스피커로 보내고, 서라운드 마이크는 서라운드 채널로 보내는 방식임.
Mixer Preset Creation
Section titled “Mixer Preset Creation”There are 2 options to save mixer presets:
Option 1
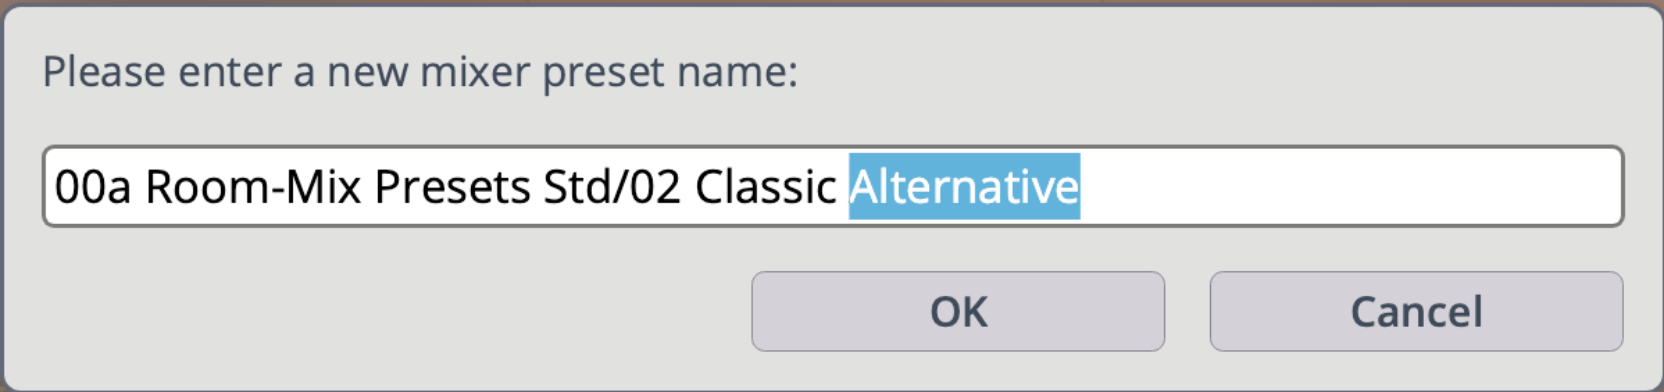
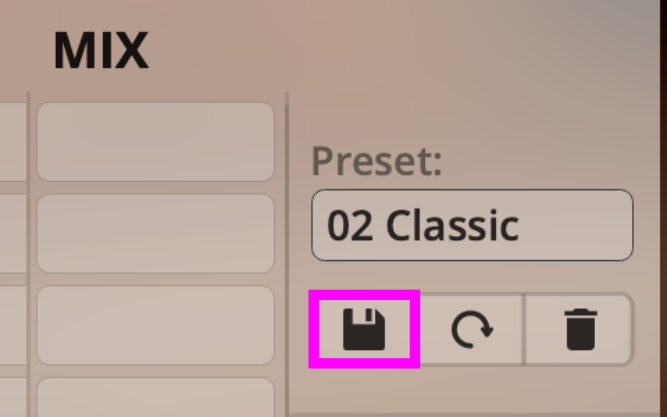
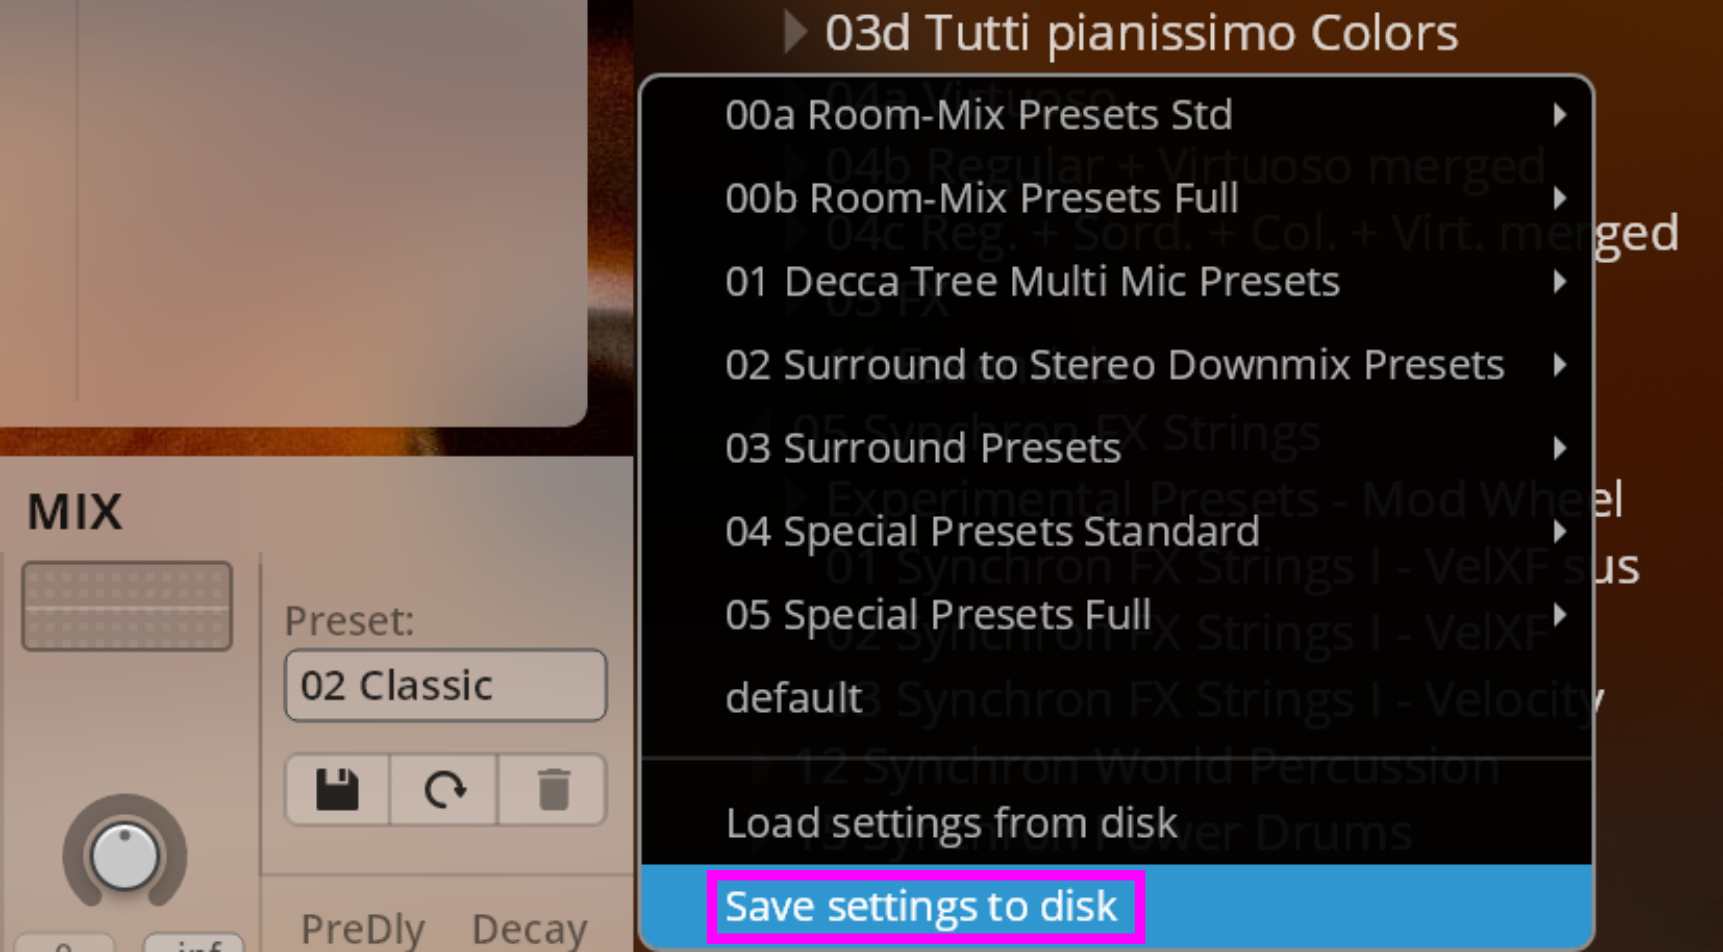
Create additional mixer presets or folders, click the disk symbol and enter your folder/preset name. Sorting will be alphabetical.
Warning
Newly created presets are only available when saved with a new User Preset, otherwise they will be lost!
Option 2
Save your additional mixer presets to disk and manage them as separate files in a location of your choice.
Note
Different products will offer a different mixer setup, so please bear in mind that product-specific mixer presets will only work with those products.
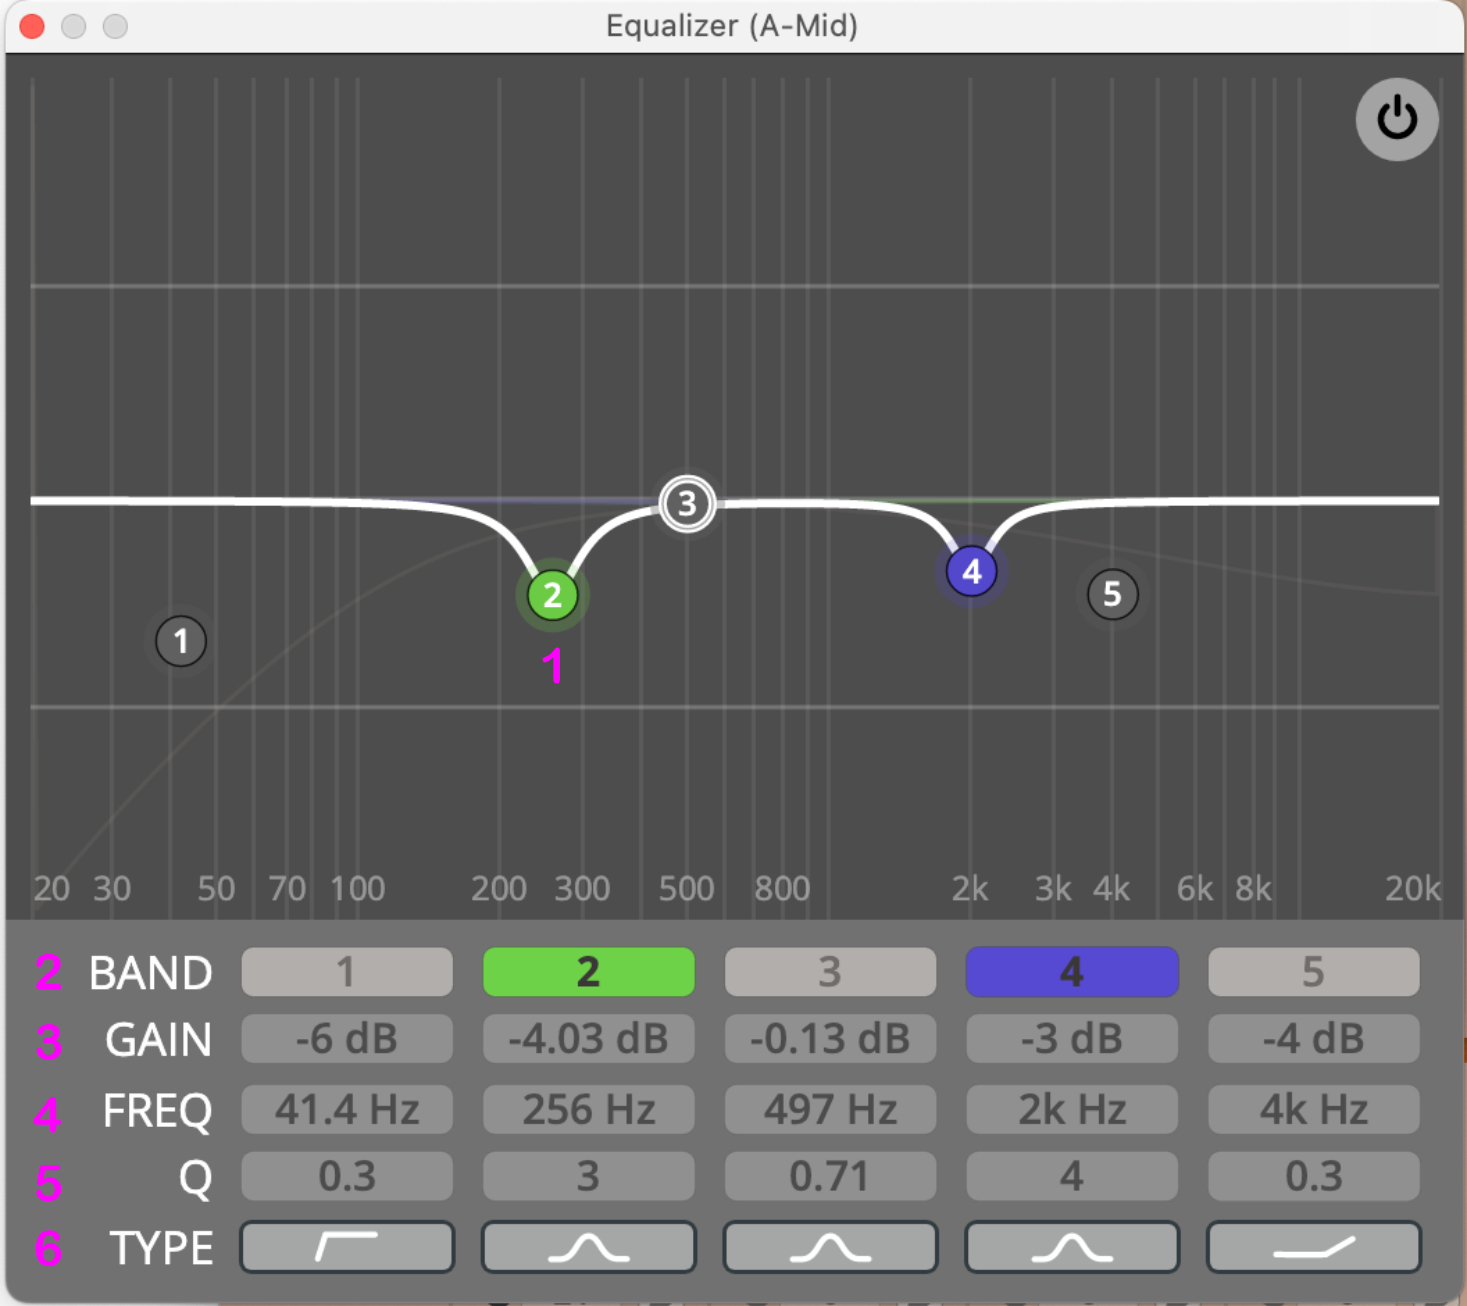
Double-click the Mixer EQ of each channel to open the EQ window.
-
EQ Node: Click the BAND buttons to activate the corresponding band. In the GUI, right-click a BAND node to change the filter type. Use your mouse wheel to change the Q value,
Cmd/Ctrlclick to reset,Option/Altclick to lock frequency,Shiftdrag to fine-tune the settings. -
BAND: Activate/deactivate the filter band.
-
GAIN: Gain value of the selected node in the EQ display window.
Shiftclick-drag to fine-tune. Click-drag or double-click to edit.Cmd/Ctrlclick to reset. -
FREQ: Frequency of the selected node in the EQ display window.
Shiftclick-drag to fine-tune. Click-drag or double-click to edit.Cmnd/Ctrlclick to reset. -
Q: Q value of the selected node in the EQ display window.
Shiftclick-drag to fine-tune. Click-drag or double-click to edit.Cmd/Ctrlclick to reset. -
TYPE: Choose from these available filter types: Peak, Low-Shelf, High-Shelf, High Cut., Low Cut, Bandpass, Notch.
Power Pan
Section titled “Power Pan”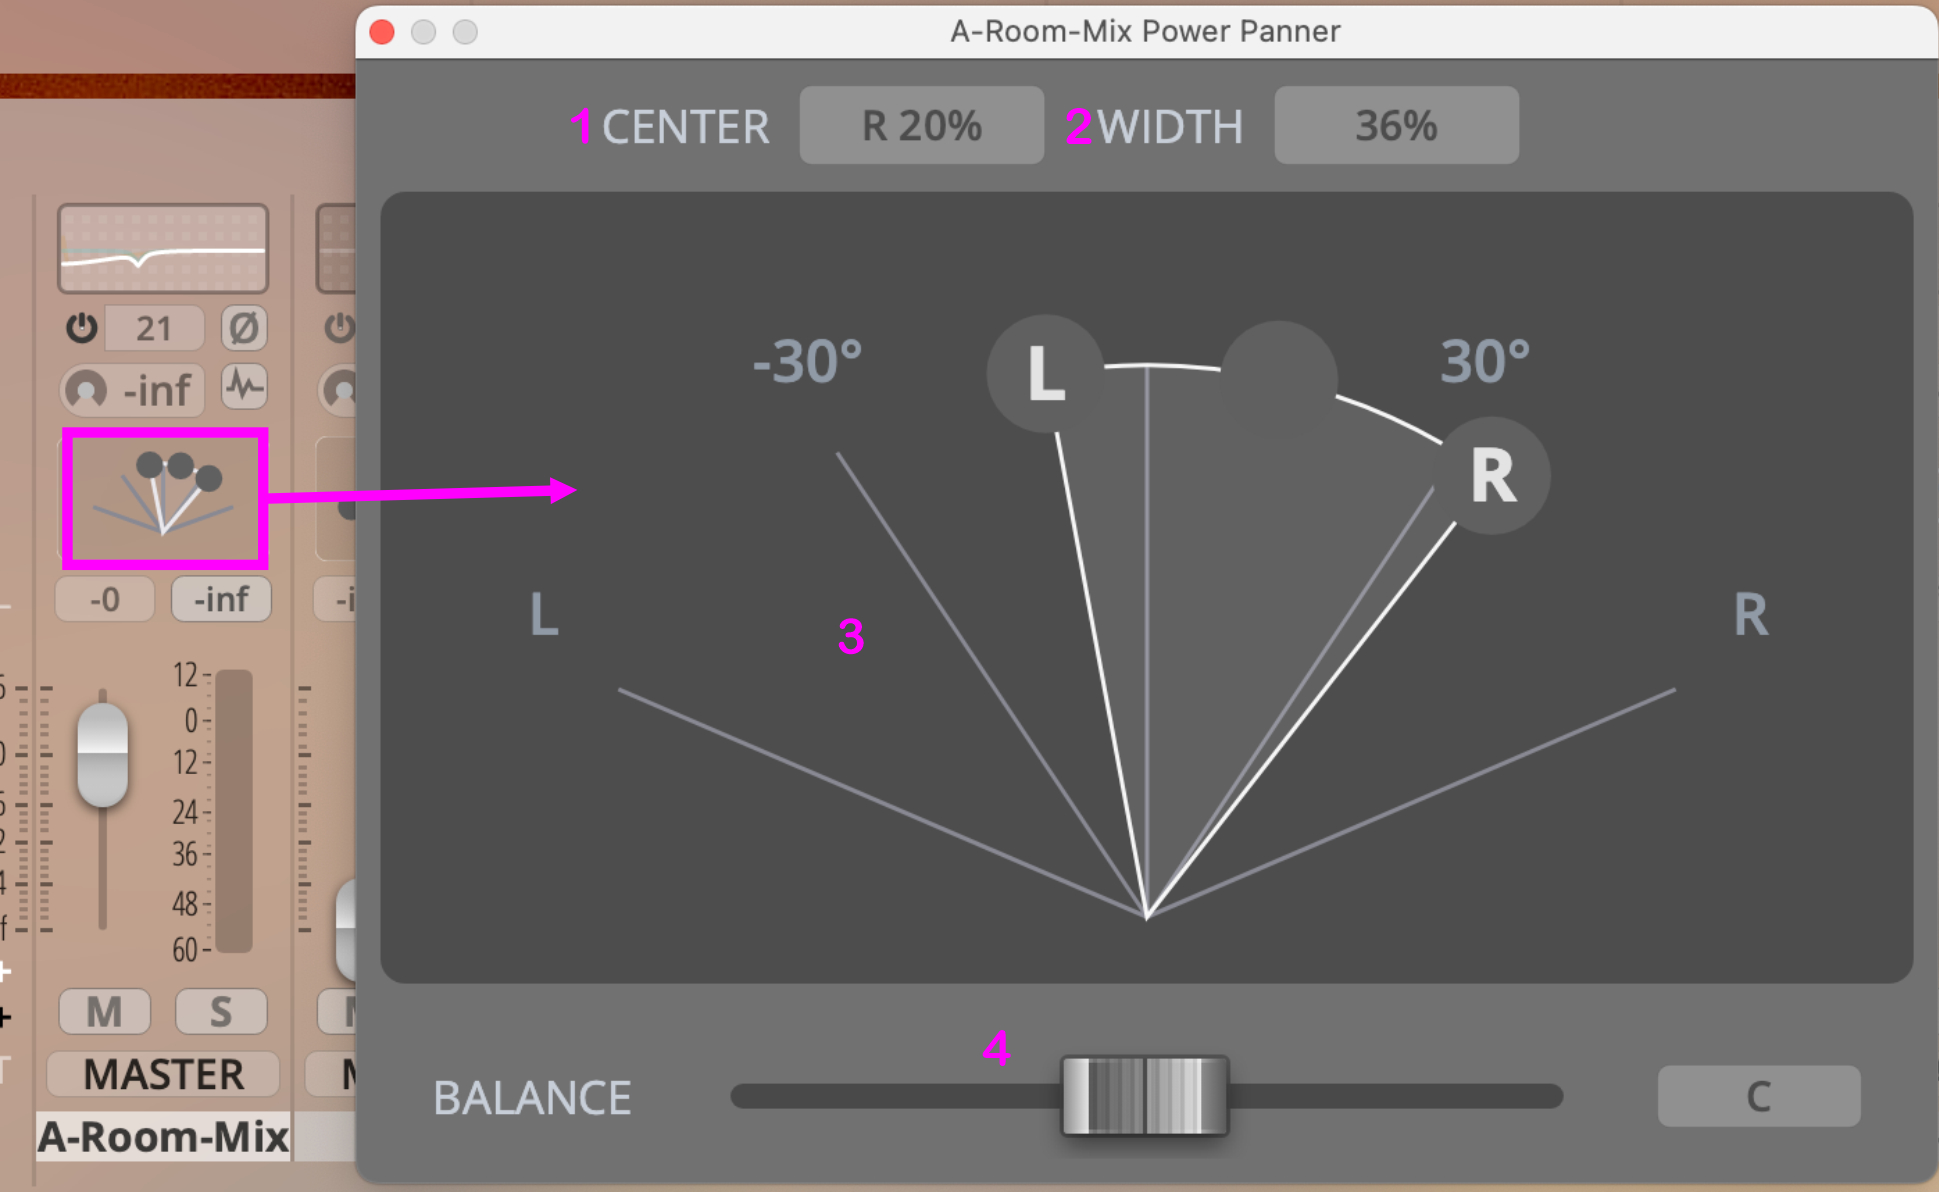
-
CENTER: Panning center, in %. Click-drag or double-click to edit.
Cmd/Ctrlclick to reset. -
WIDTH: Panning width, in %. Click-drag or double-click to edit.
Cmd/Ctrlclick to reset. -
DISPLAY: Grab nodes to adjust pan settings. Will change color when inverted.
Cmd/Ctrlclick to reset. -
BALANCE: PowerPan balance. Applies set amounts of balancing features. Shift-drag to fine-tune.
Cmd/Ctrlclick to reset.
Impulse Convolution Reverb (for Studio products only)
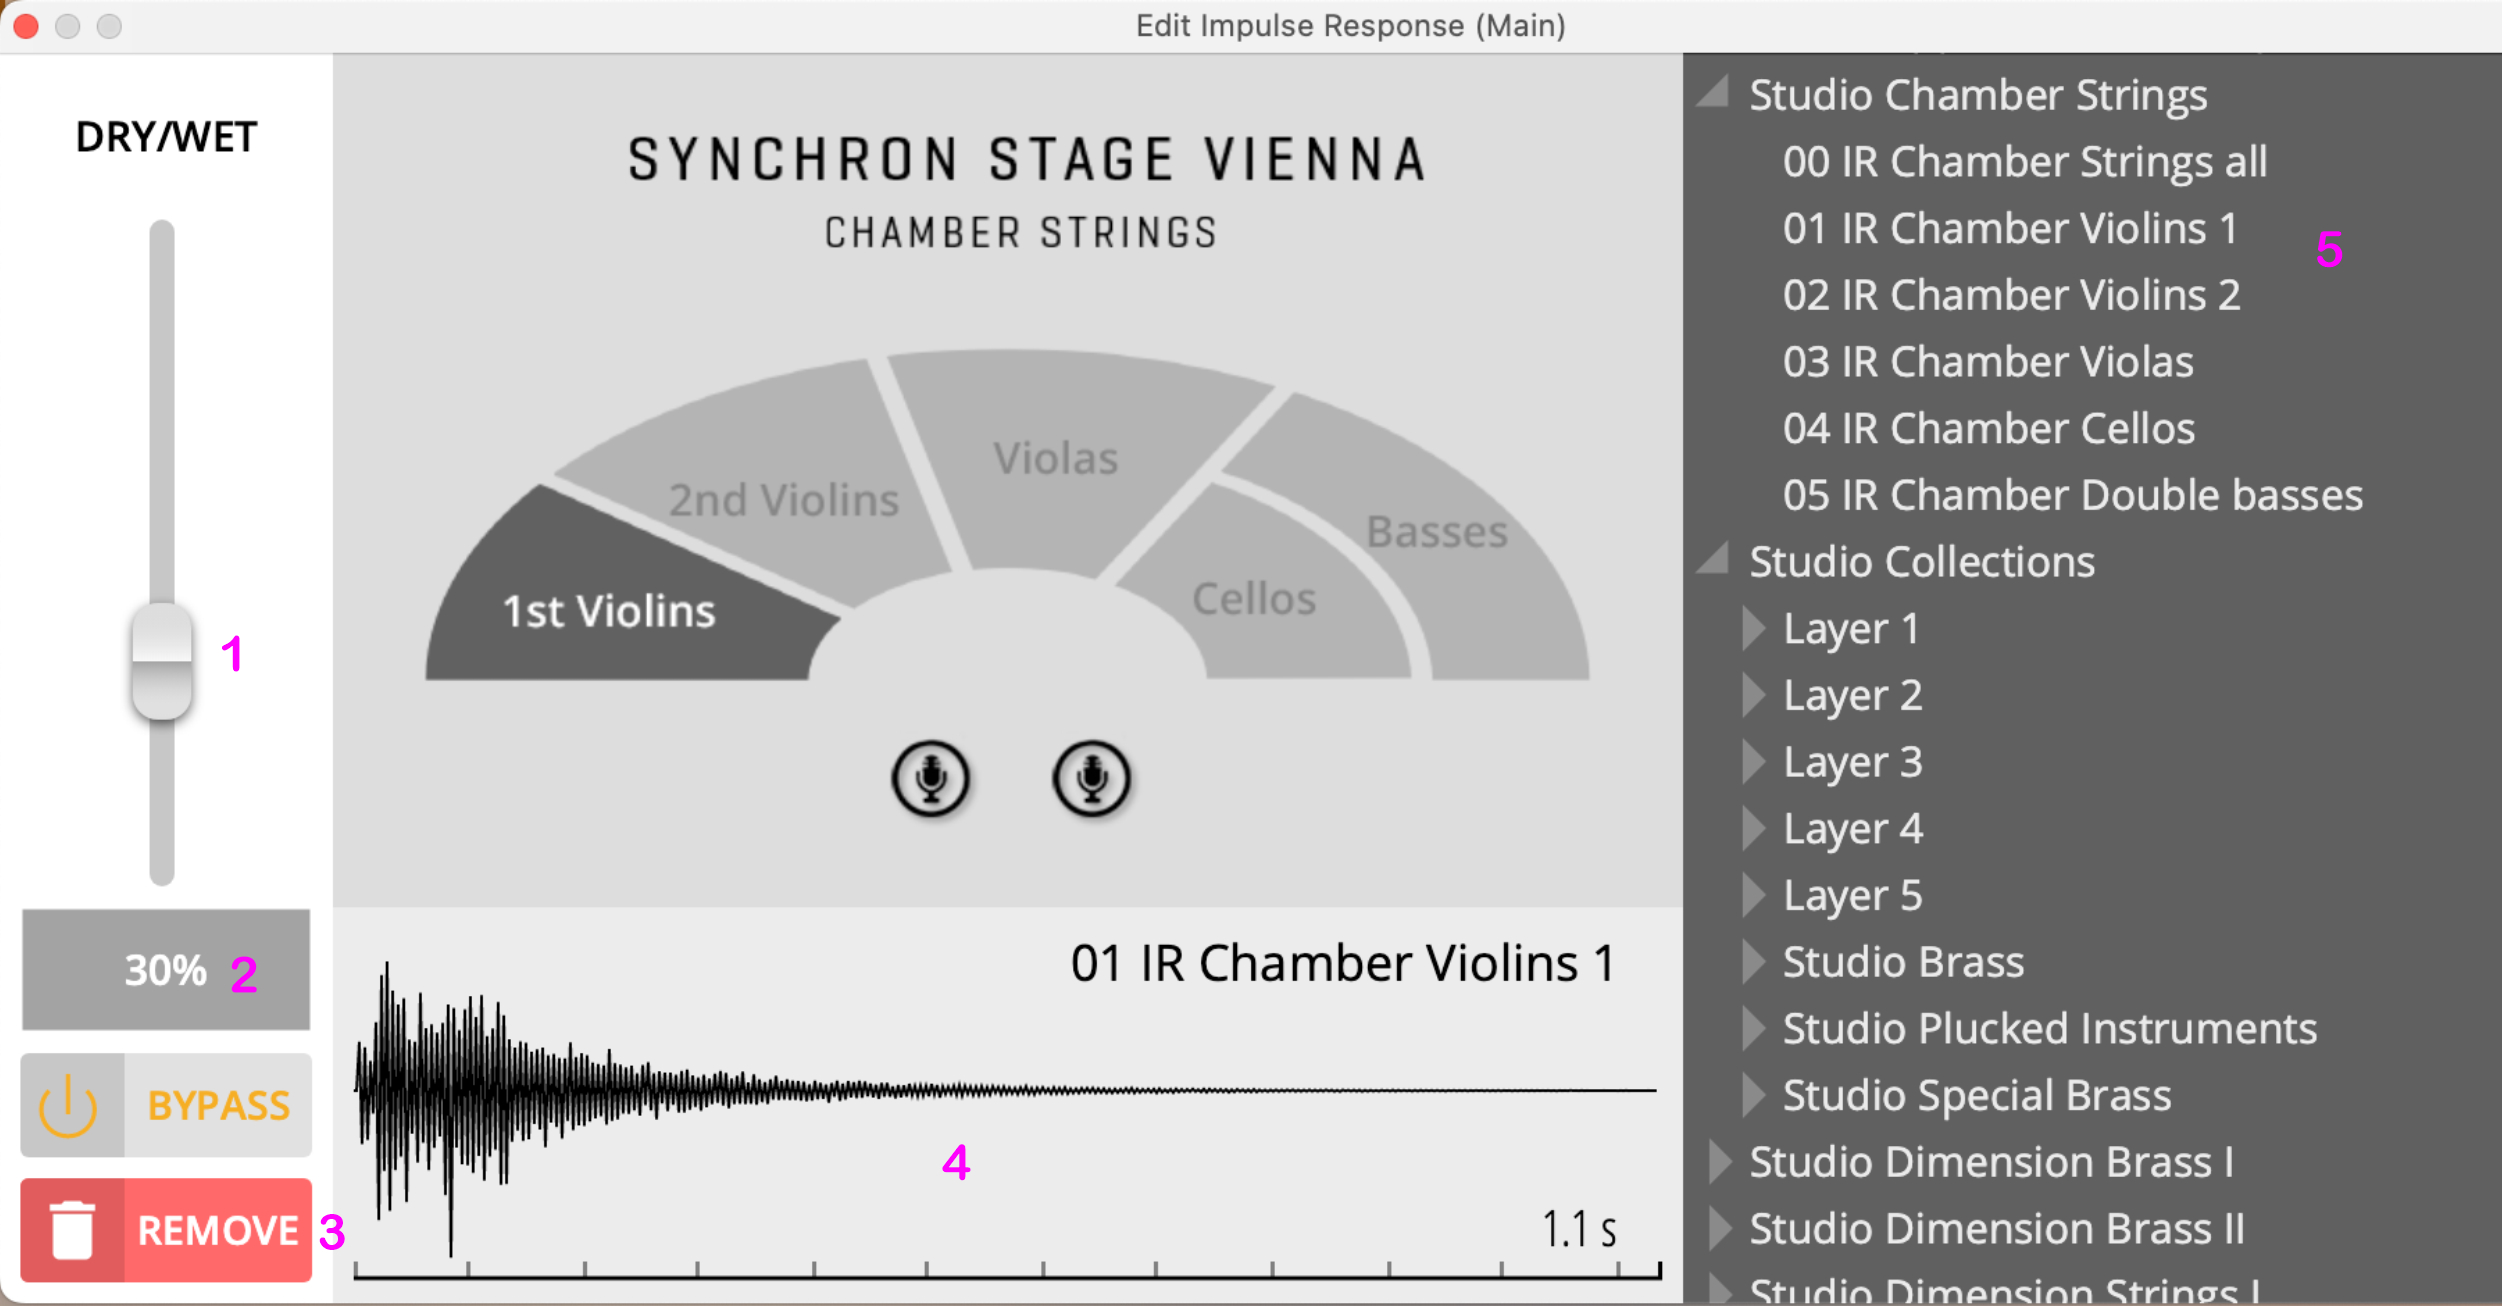
Section titled “Impulse Convolution Reverb (for Studio products only)”This additionalConvolution Reverb is based on our MIR PRO technology and offers a simple, yet effective way to integrate our Studio with other products of our Synchron Series.
You can easily adjust the Dry/Wet Ratio to fit your mix.
Don’t forget that, depending on your chosen Mixer Preset, your reverb sends might also need some adjustment.
-
DRY/WET Slider: Controls the amount of reverb added to the signal. Higher settings will make the signal sound more embedded in the virtual space.
-
BYPASS: Will bypass impulse reverb processing. Will not release CPU resources.
-
REMOVE: Removes impulse reverb processing from the channel’s processing chain. Will also release CPU resources.
-
IMPULSE RESPONSE DISPLAY: Displays a simplified waveform of the applied impulse response.
-
IMPULSE RESPONSE BROWSER: Browse through all available impulse files for your registered Studio products. Double-click on a file to load it into the channel’s impulse reverb processor.
Mixer Context Menus
Section titled “Mixer Context Menus”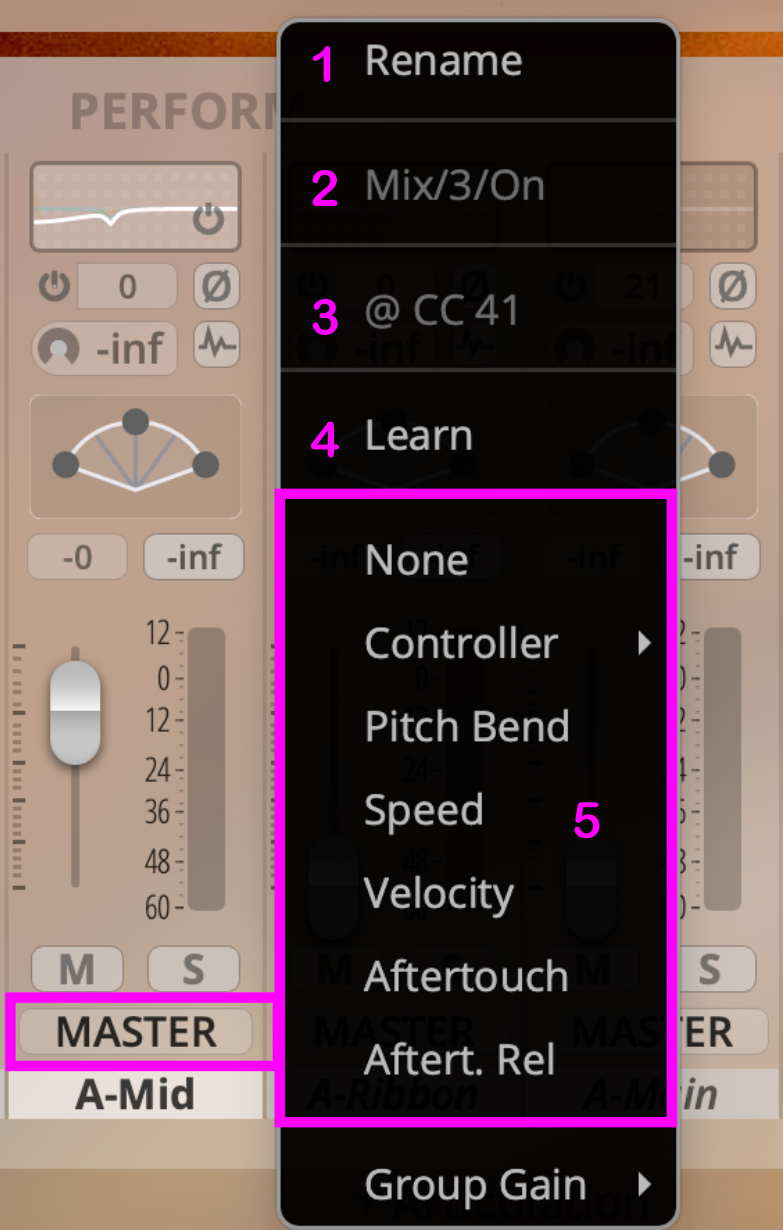
These context menus are available via right-click for all controls in Mix View.
Additionally, you can choose between Balance and Power Pan in the PAN Section.
-
Rename: Choose your own name for the mixer channel.
-
Audio Parameter Name: The name of the underlying audio parameter, which can be automated.
-
Selected Control: Shows the name of the selected controller. Only visible if assigned.
-
Learn: Click to MIDI-learn.
-
Available Control Sources: Choose the controller you want from this list.
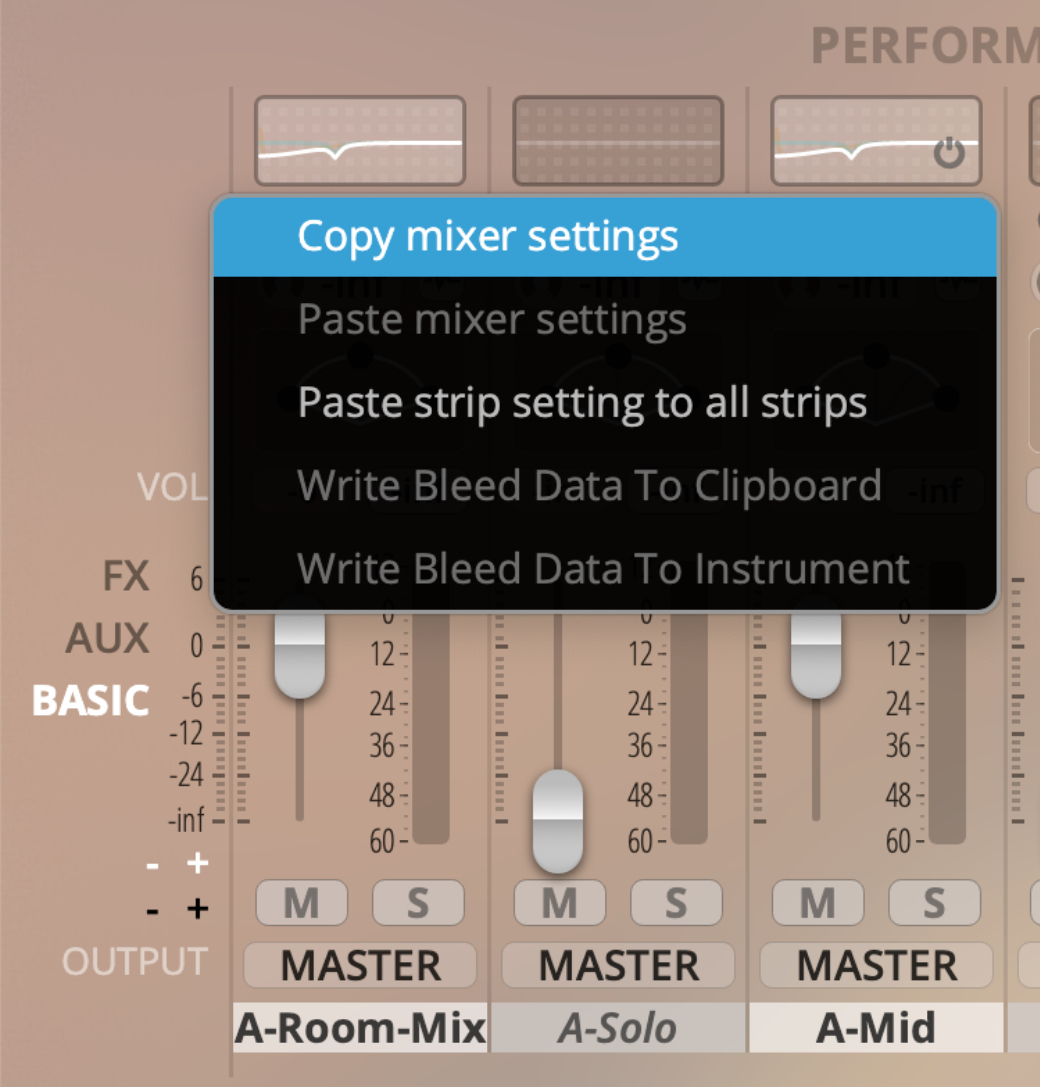
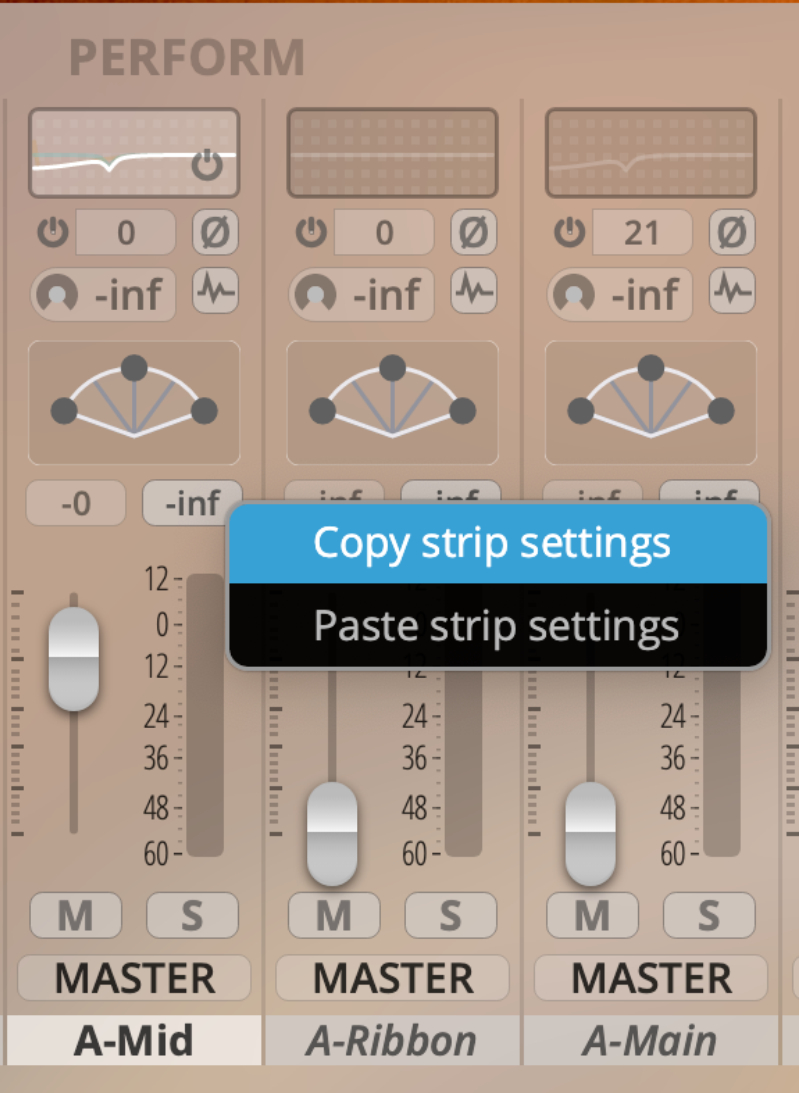
Right-clicking directly in the volume meter of a channel strip will let you copy/paste strip settings (screenshot to the left), while right-clicking the area left of the mixer (above the OUTPUT label) will present you with the options to copy/paste all mixer settings and to paste the settings of your previously copied mixer strip to all strips.
If you have Synchron Power Drums loaded, clicking to copy/paste mixer settings will also offer the option to write bleed data to the clipboard or to the loaded instrument.